Create your first webhook
Step-by-step: create a webhook endpoint, authenticate it, map your payload and connect it to a Shopify Flow workflow.
This walks you from an empty app to a Shopify Flow workflow that runs when your own system says so. About ten minutes.
1. Create a webhook
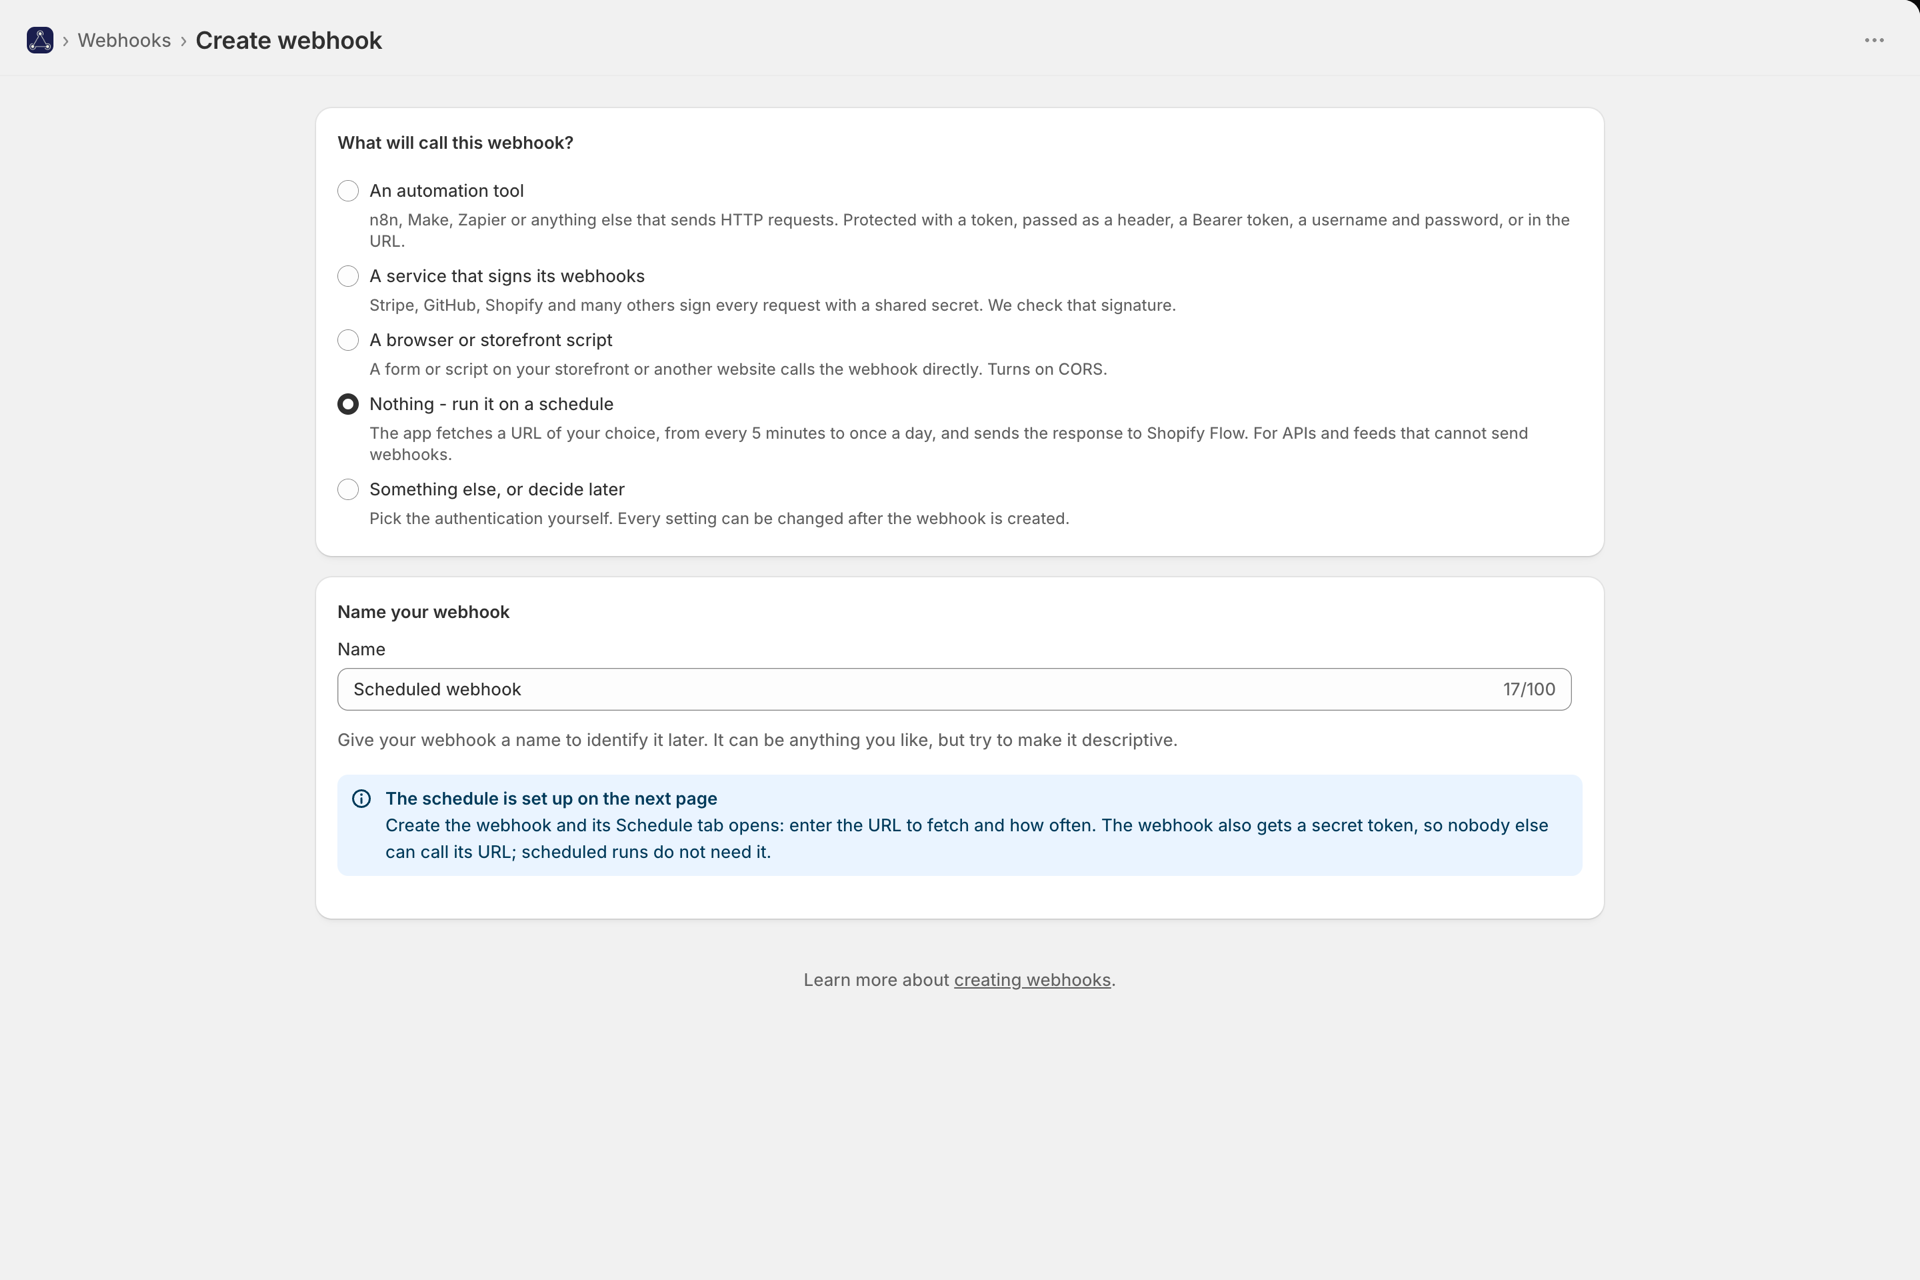
Webhooks -> Create webhook. The page first asks what will call this webhook, and sets it up to match:
| Your answer | What you get |
|---|---|
| An automation tool (n8n, Make, Zapier, your own code) | A generated token, ready to paste into the tool |
| A service that signs its webhooks (Stripe, GitHub, ...) | Signature verification for the service you pick - see Verifying signed webhooks |
| A browser or storefront script | CORS switched on - see CORS, the app proxy URL and browser calls |
| Nothing - run it on a schedule | A webhook that fetches a URL on a timer; its Schedule tab opens next - see Scheduled URL polling |
| Something else, or decide later | You choose the authentication yourself |
Give it a name you will recognise later ("Wallet card reminder", "Contact form") and save. Every setting can be changed afterwards.
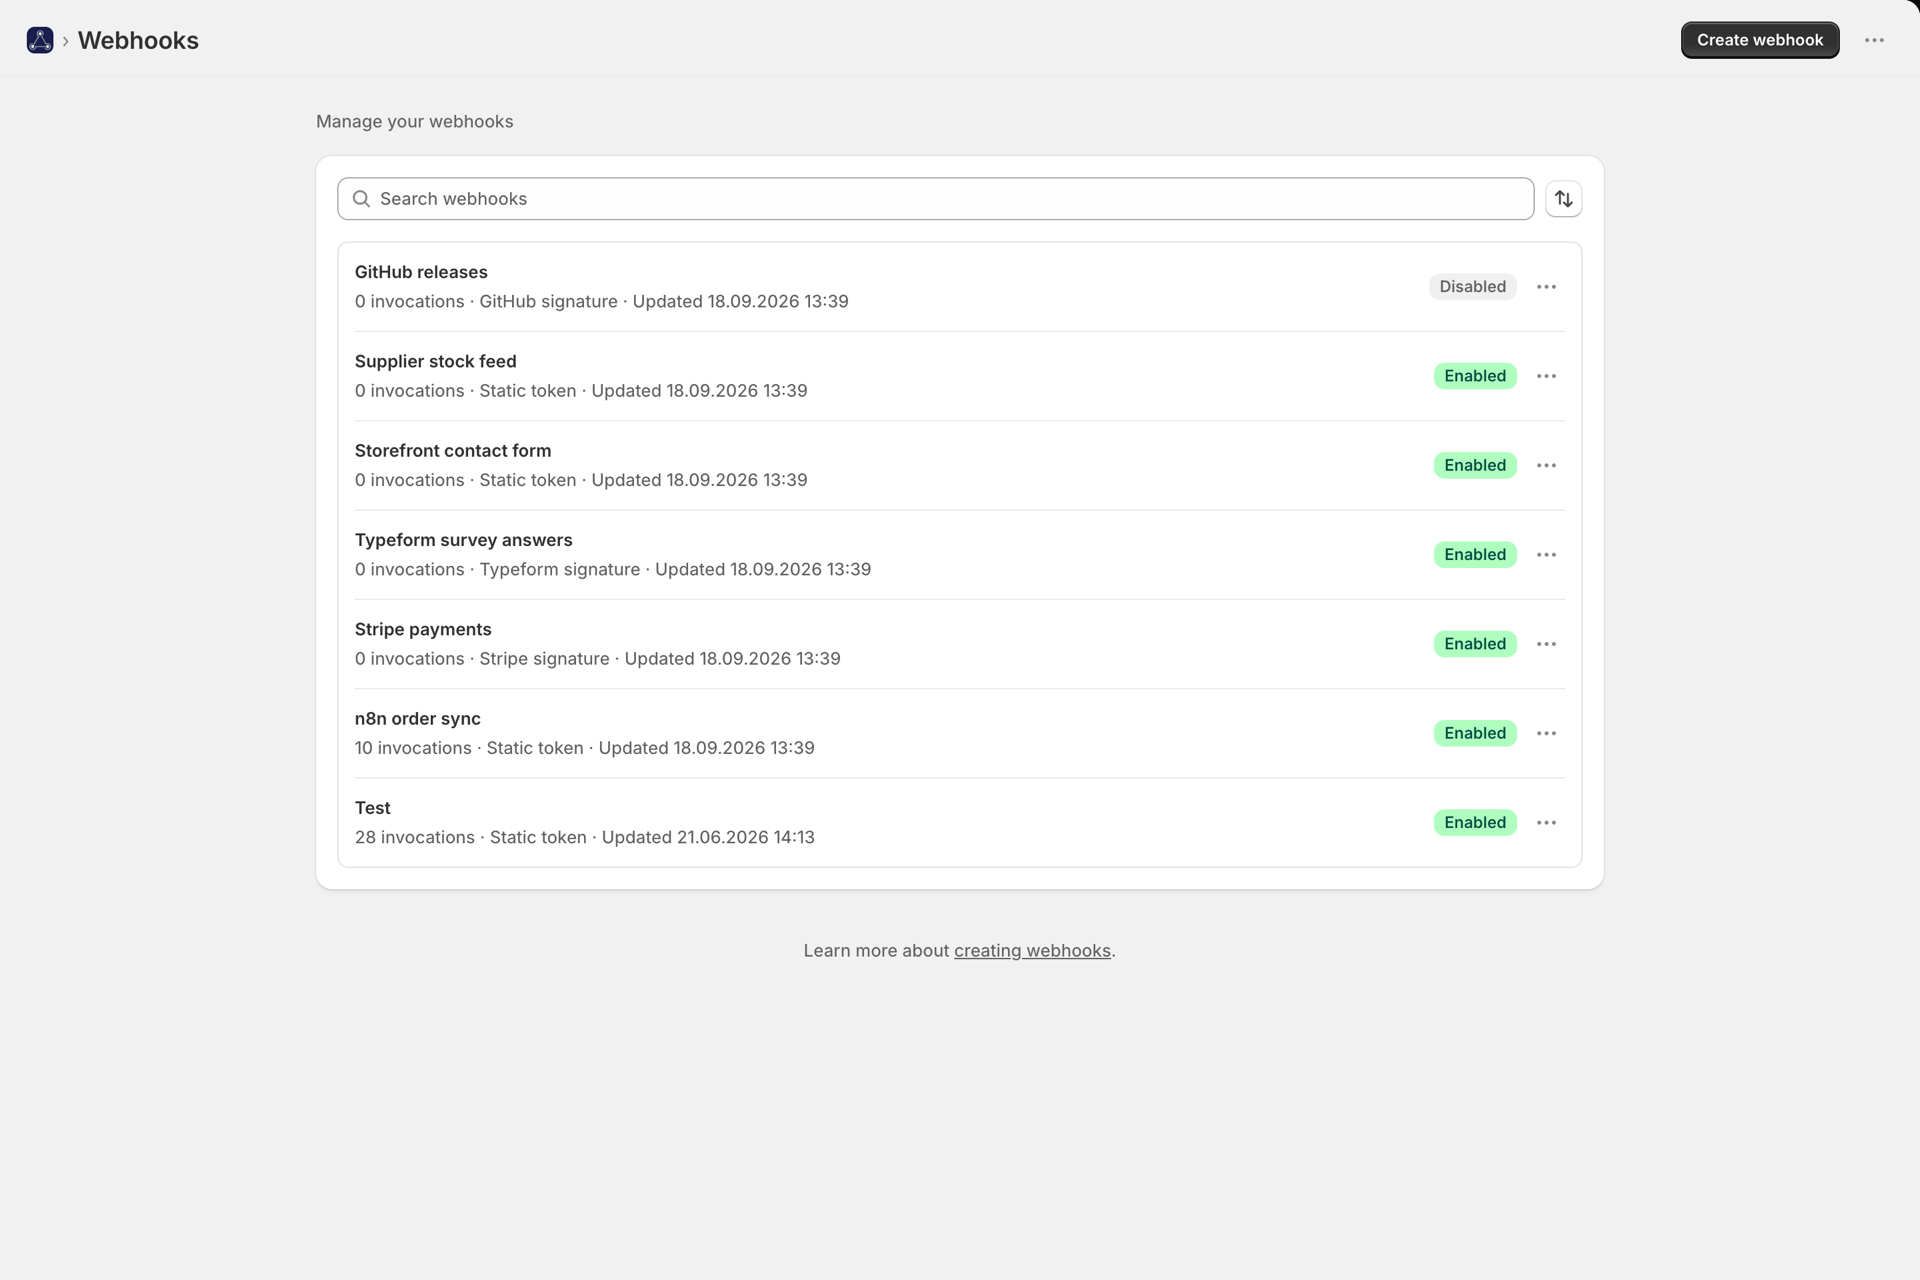
You now have a webhook URL ending in a short code, for example
https://.../webhook/ab12cd34. That URL is the endpoint your system POSTs to.
2. Choose how callers prove who they are
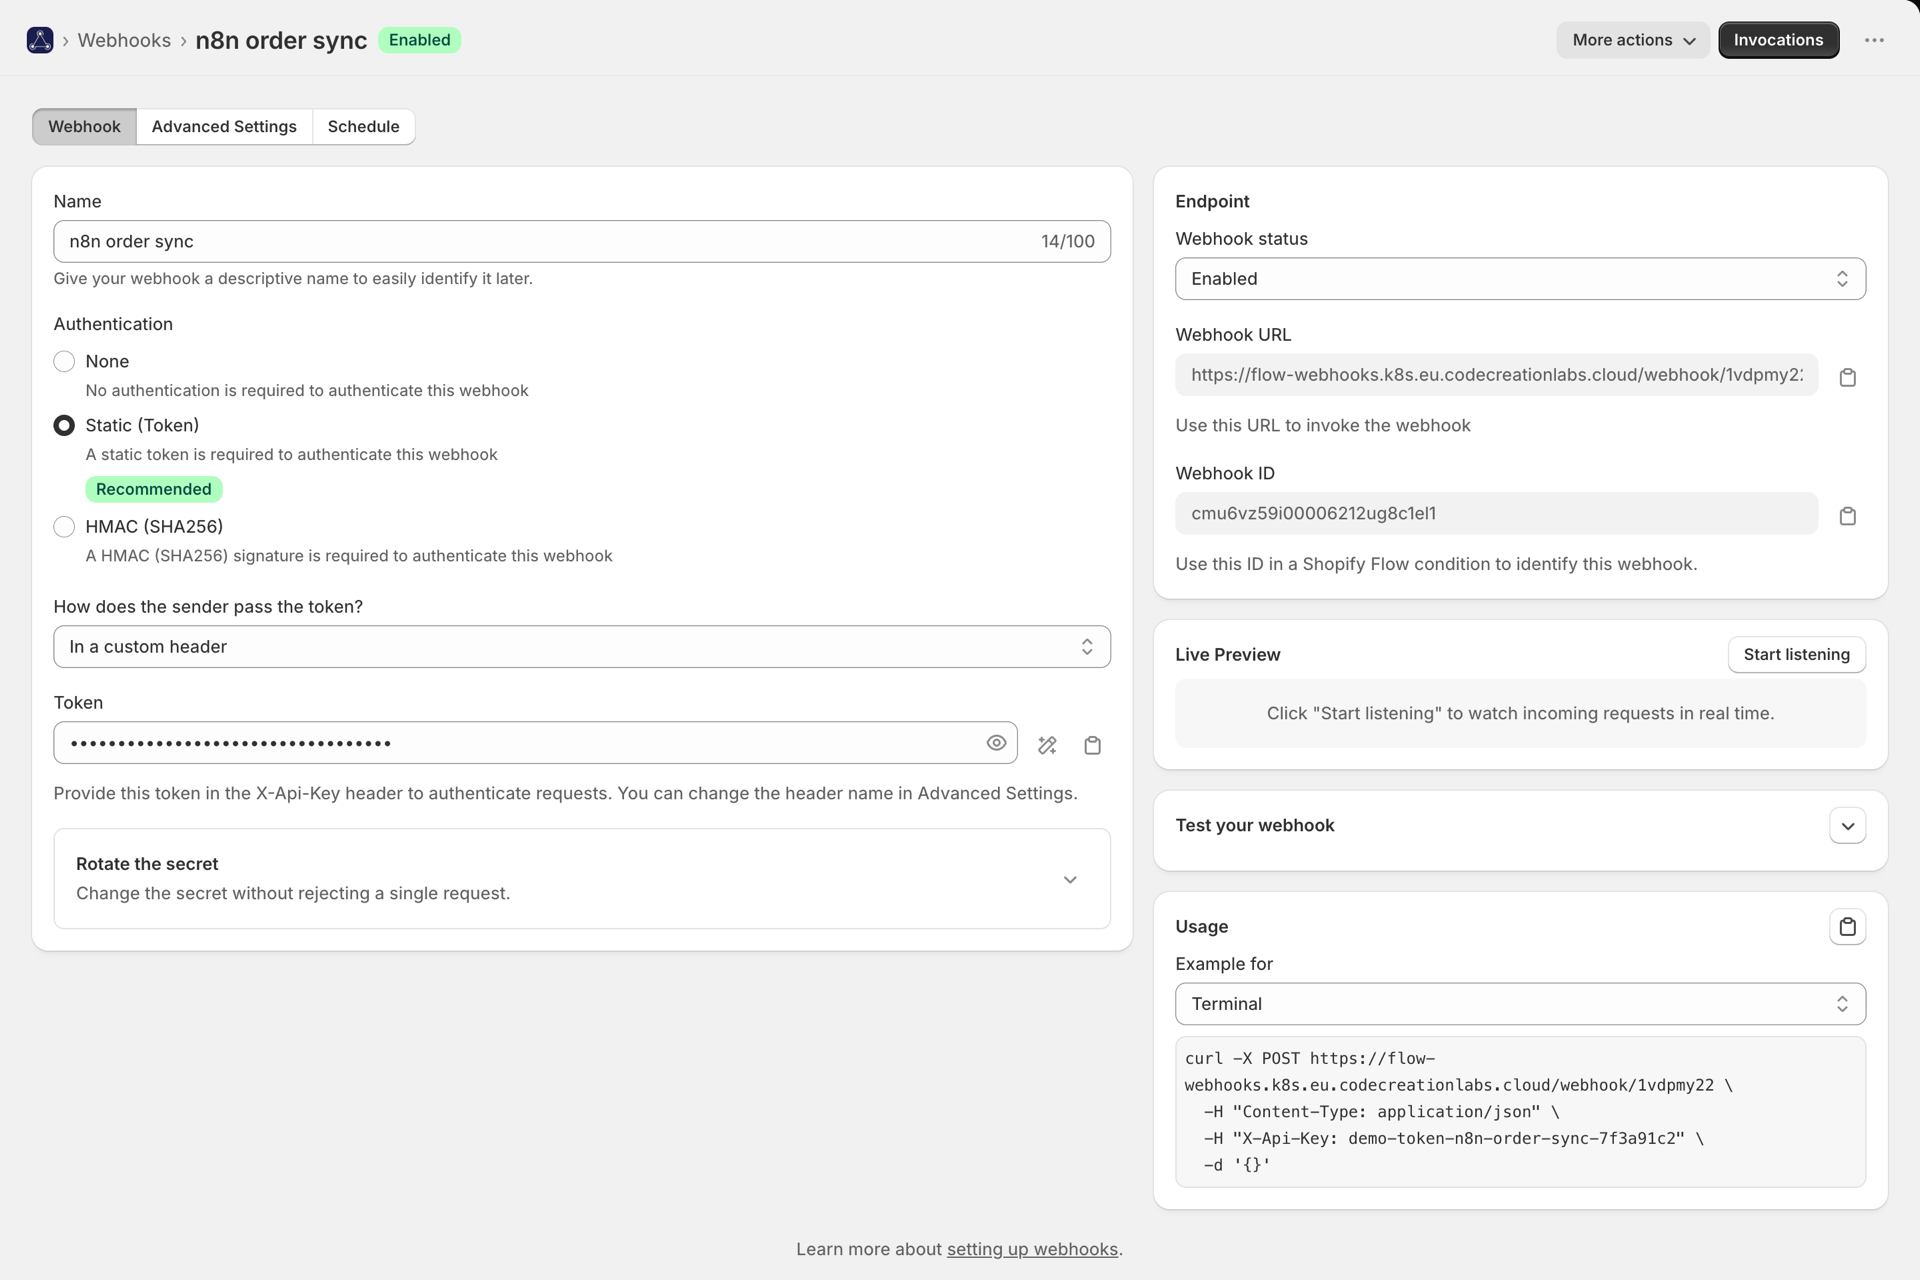
Open the webhook and pick an authentication method. See Authentication for the full comparison - the short version:
- Static token - right for almost everyone. Press the generate button, copy the token,
send it in the
X-Api-Keyheader. - HMAC SHA-256 - for senders that sign their requests (Stripe, GitHub and similar).
- None - testing only. Anyone with the URL can fire your workflow.
3. Tell us which fields you care about
Under Advanced Settings, map up to four fields out of your JSON payload. If your system sends:
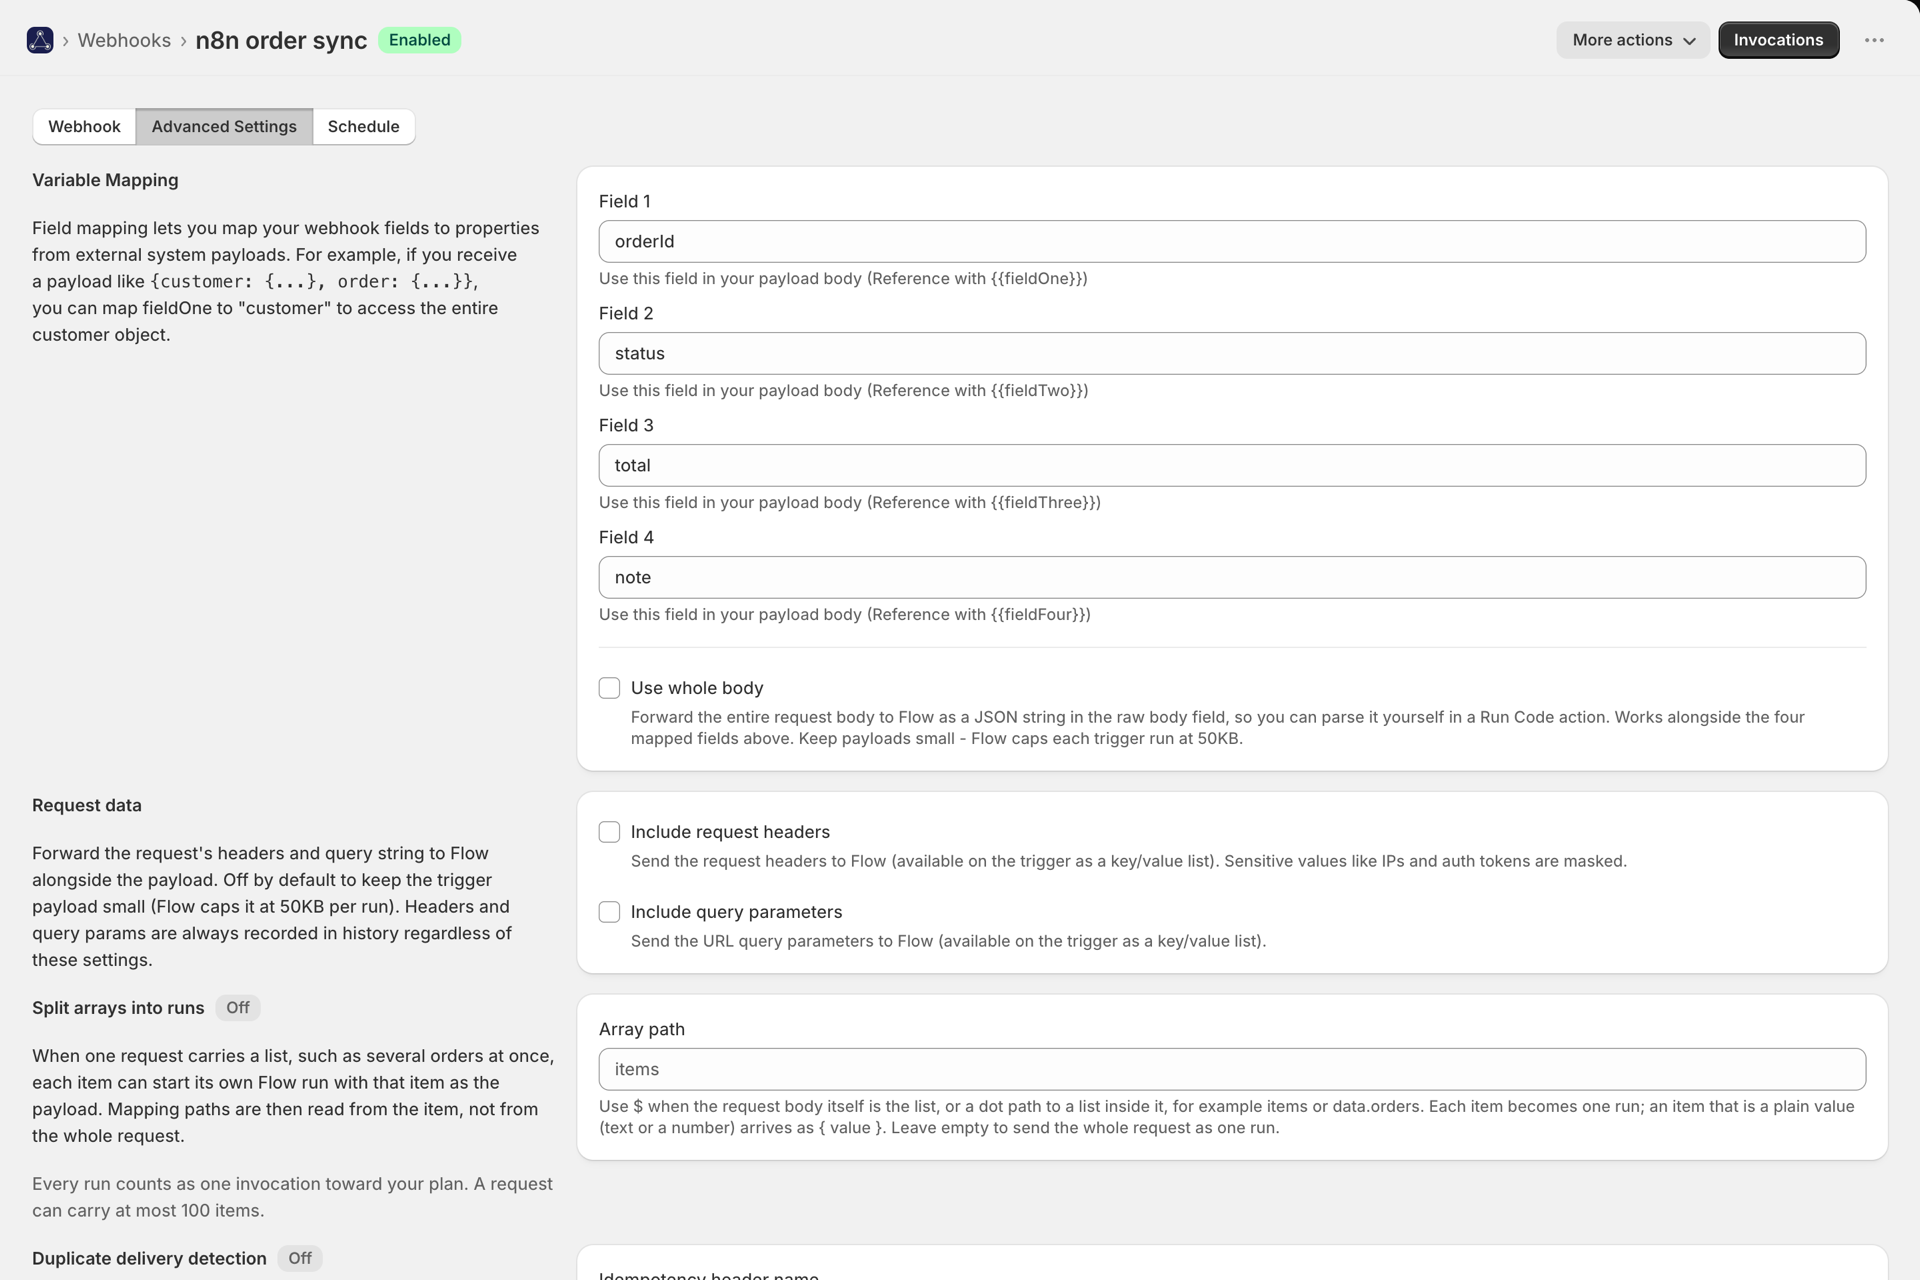
{ "customer": { "email": "someone@example.com" }, "orderId": "1001" }map fieldOne to orderId and fieldTwo to customer.email - nested paths use dots.
Full detail in Payload mapping and Flow variables.
4. Send a test request
curl -X POST https://your-app-url/webhook/ab12cd34 \
  -H "Content-Type: application/json" \
  -H "X-Api-Key: your-token" \
  -d '{"orderId":"1001","customer":{"email":"someone@example.com"}}'
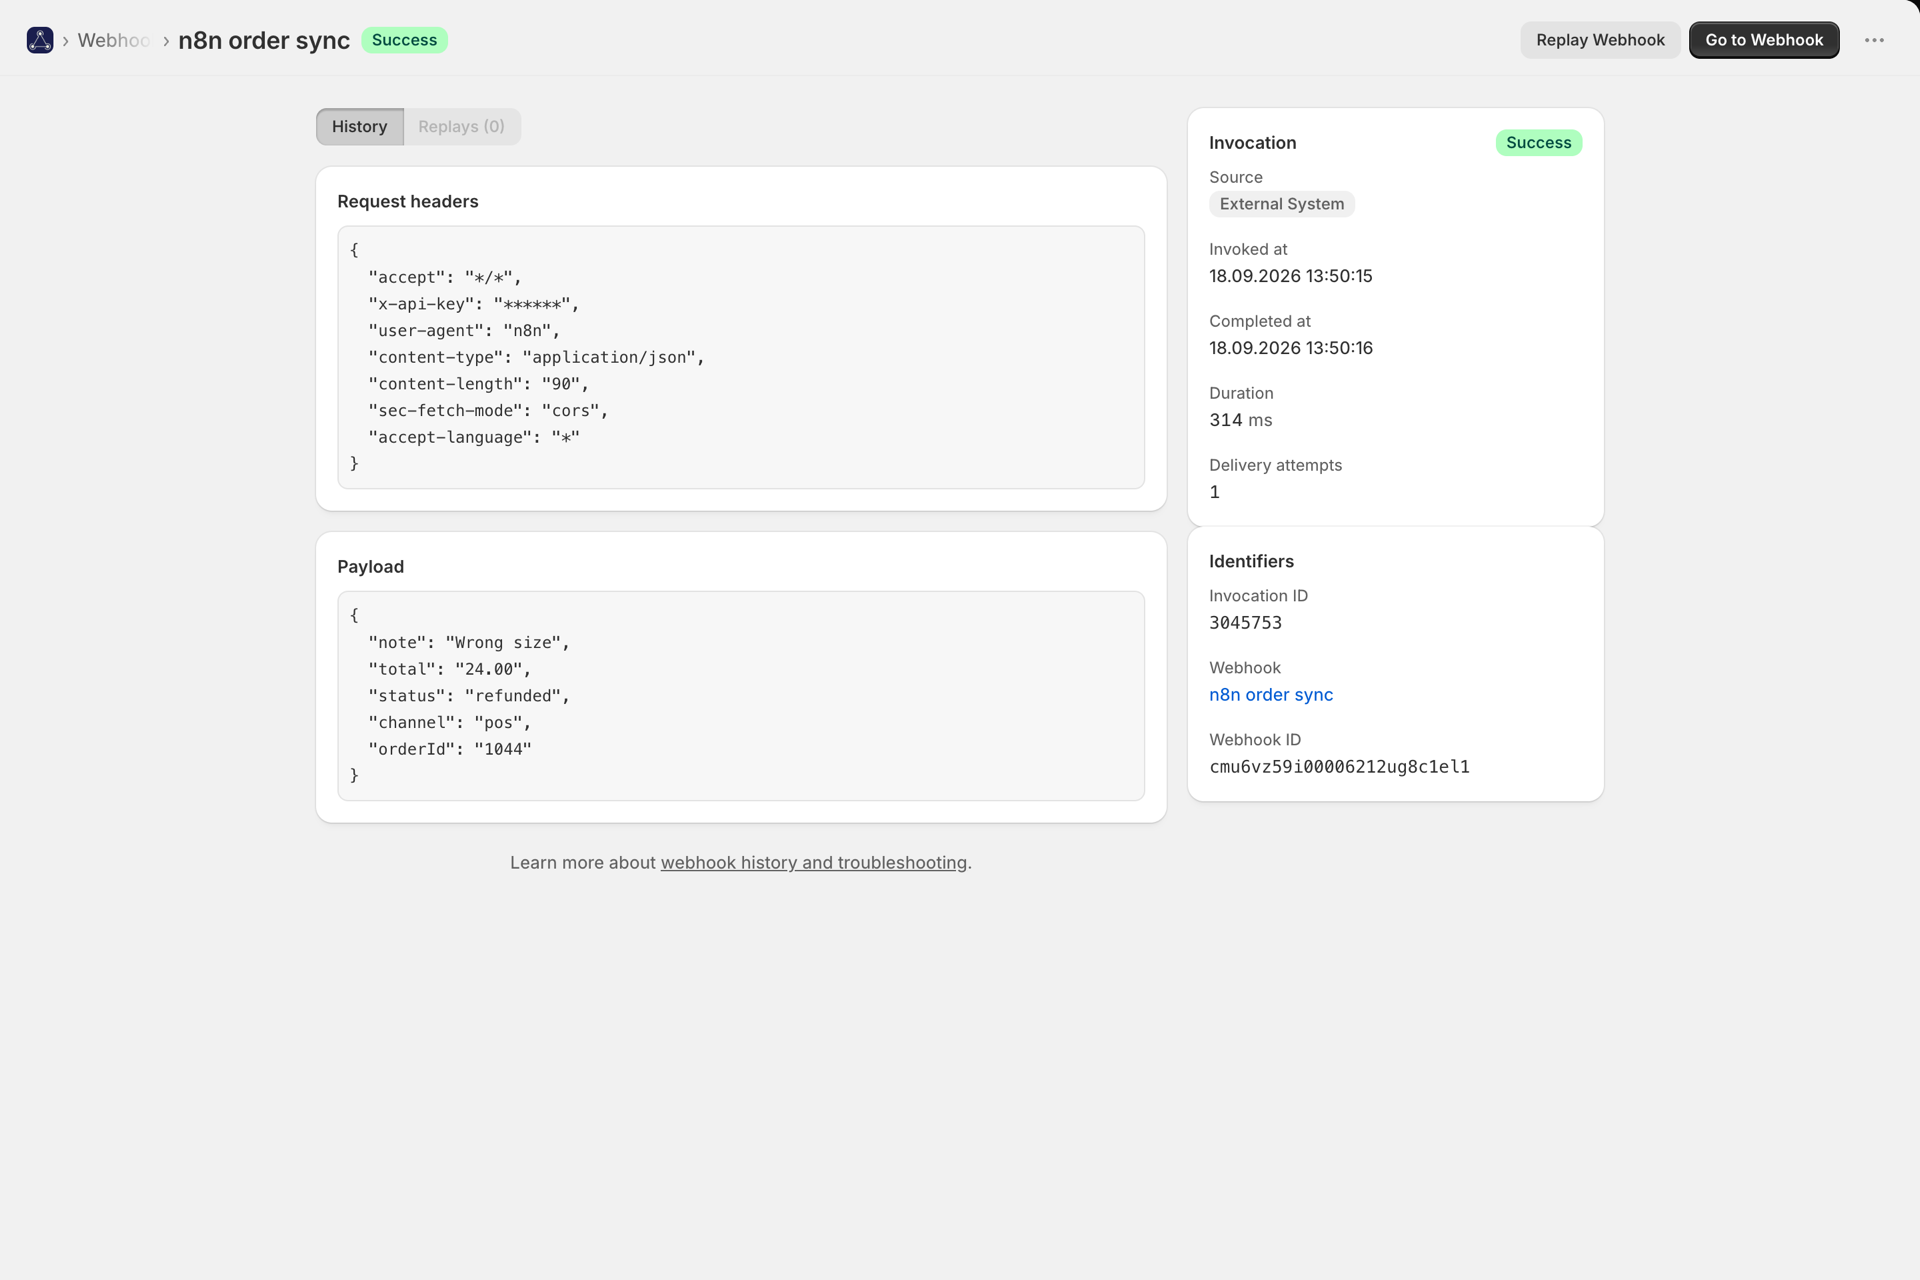
Open History. You should see the call with its status, headers and payload. If it is not there, History and troubleshooting lists every rejection reason.
5. Build the Flow workflow
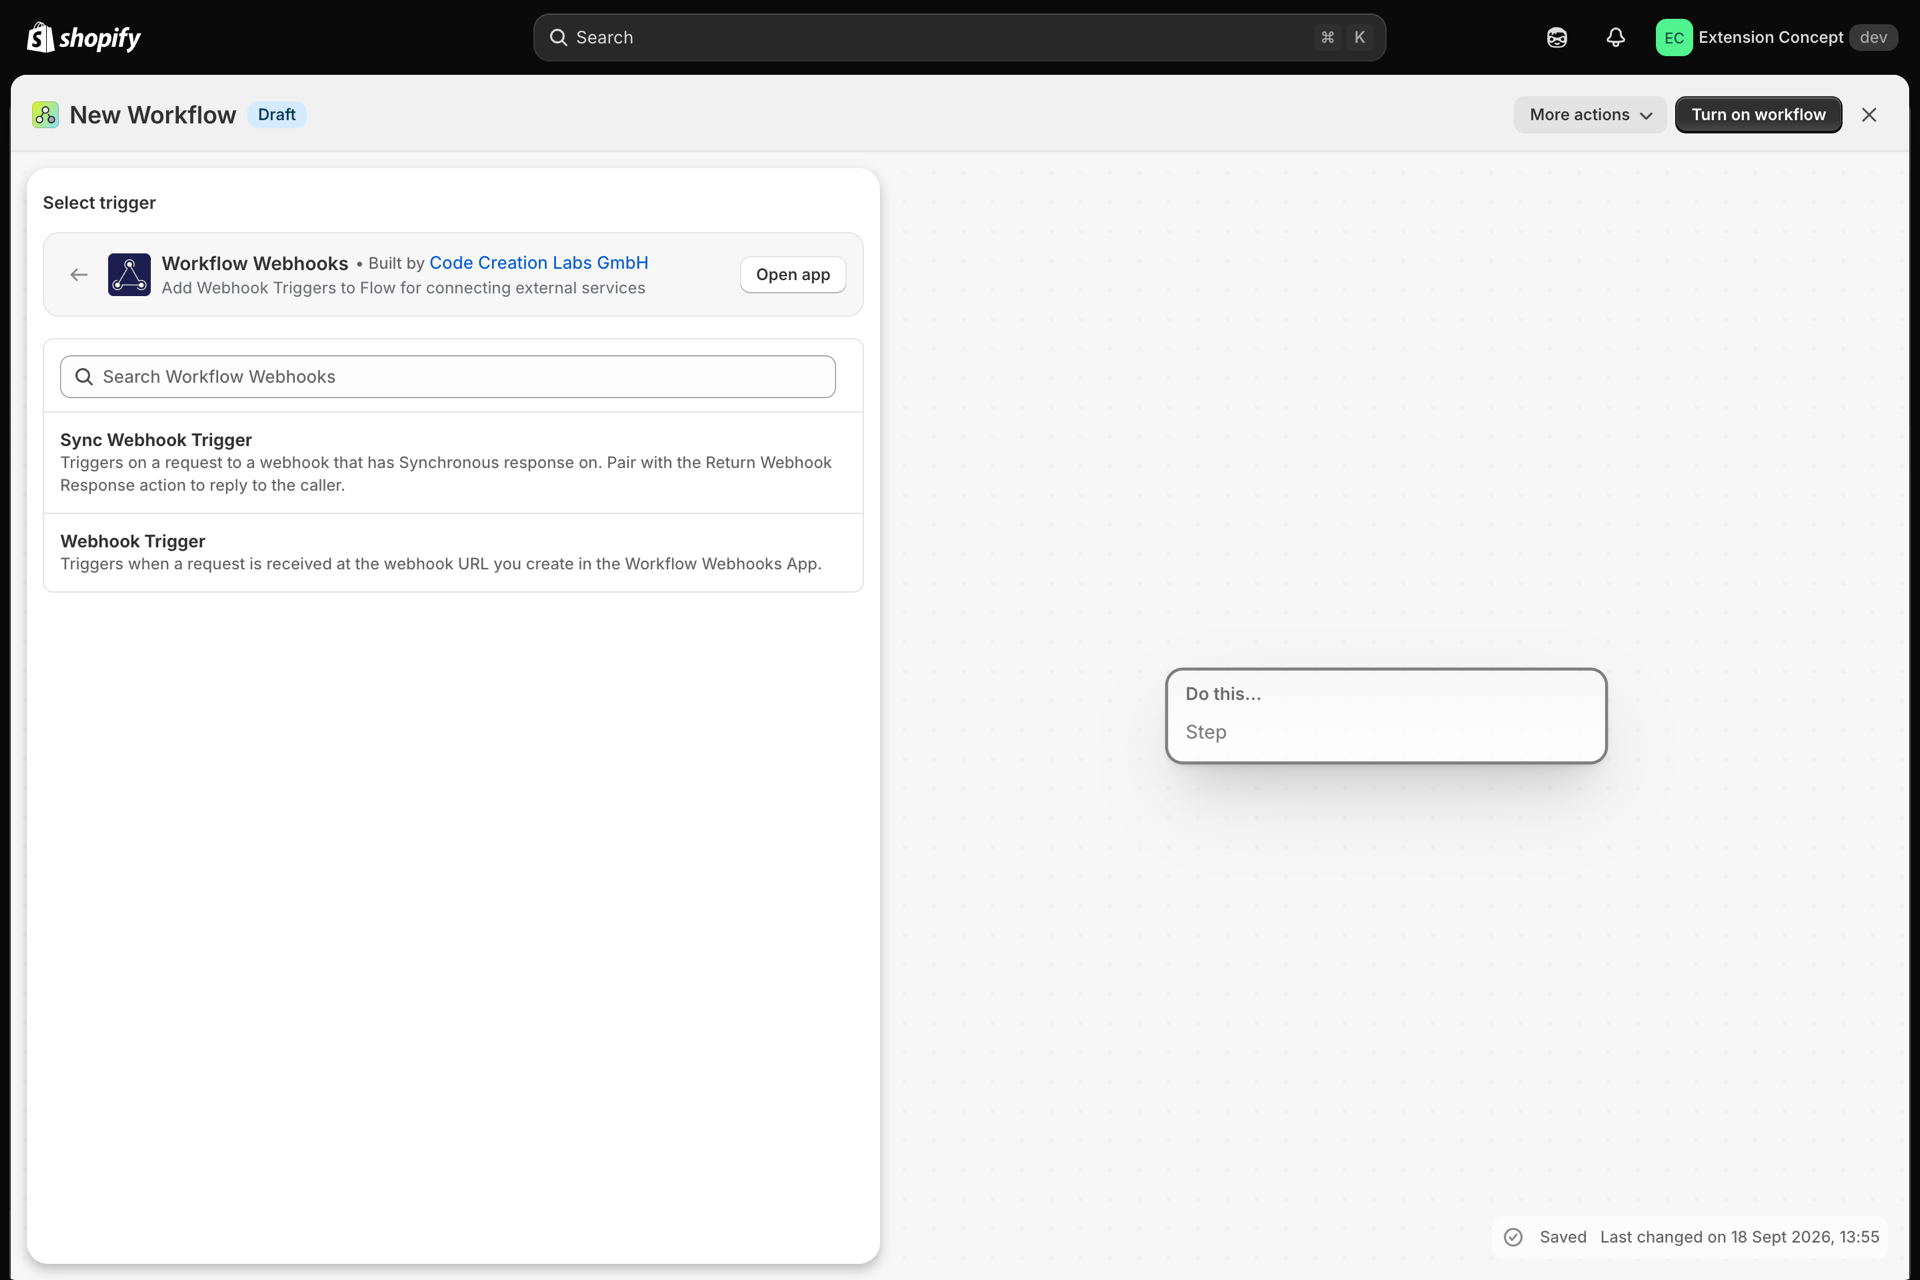
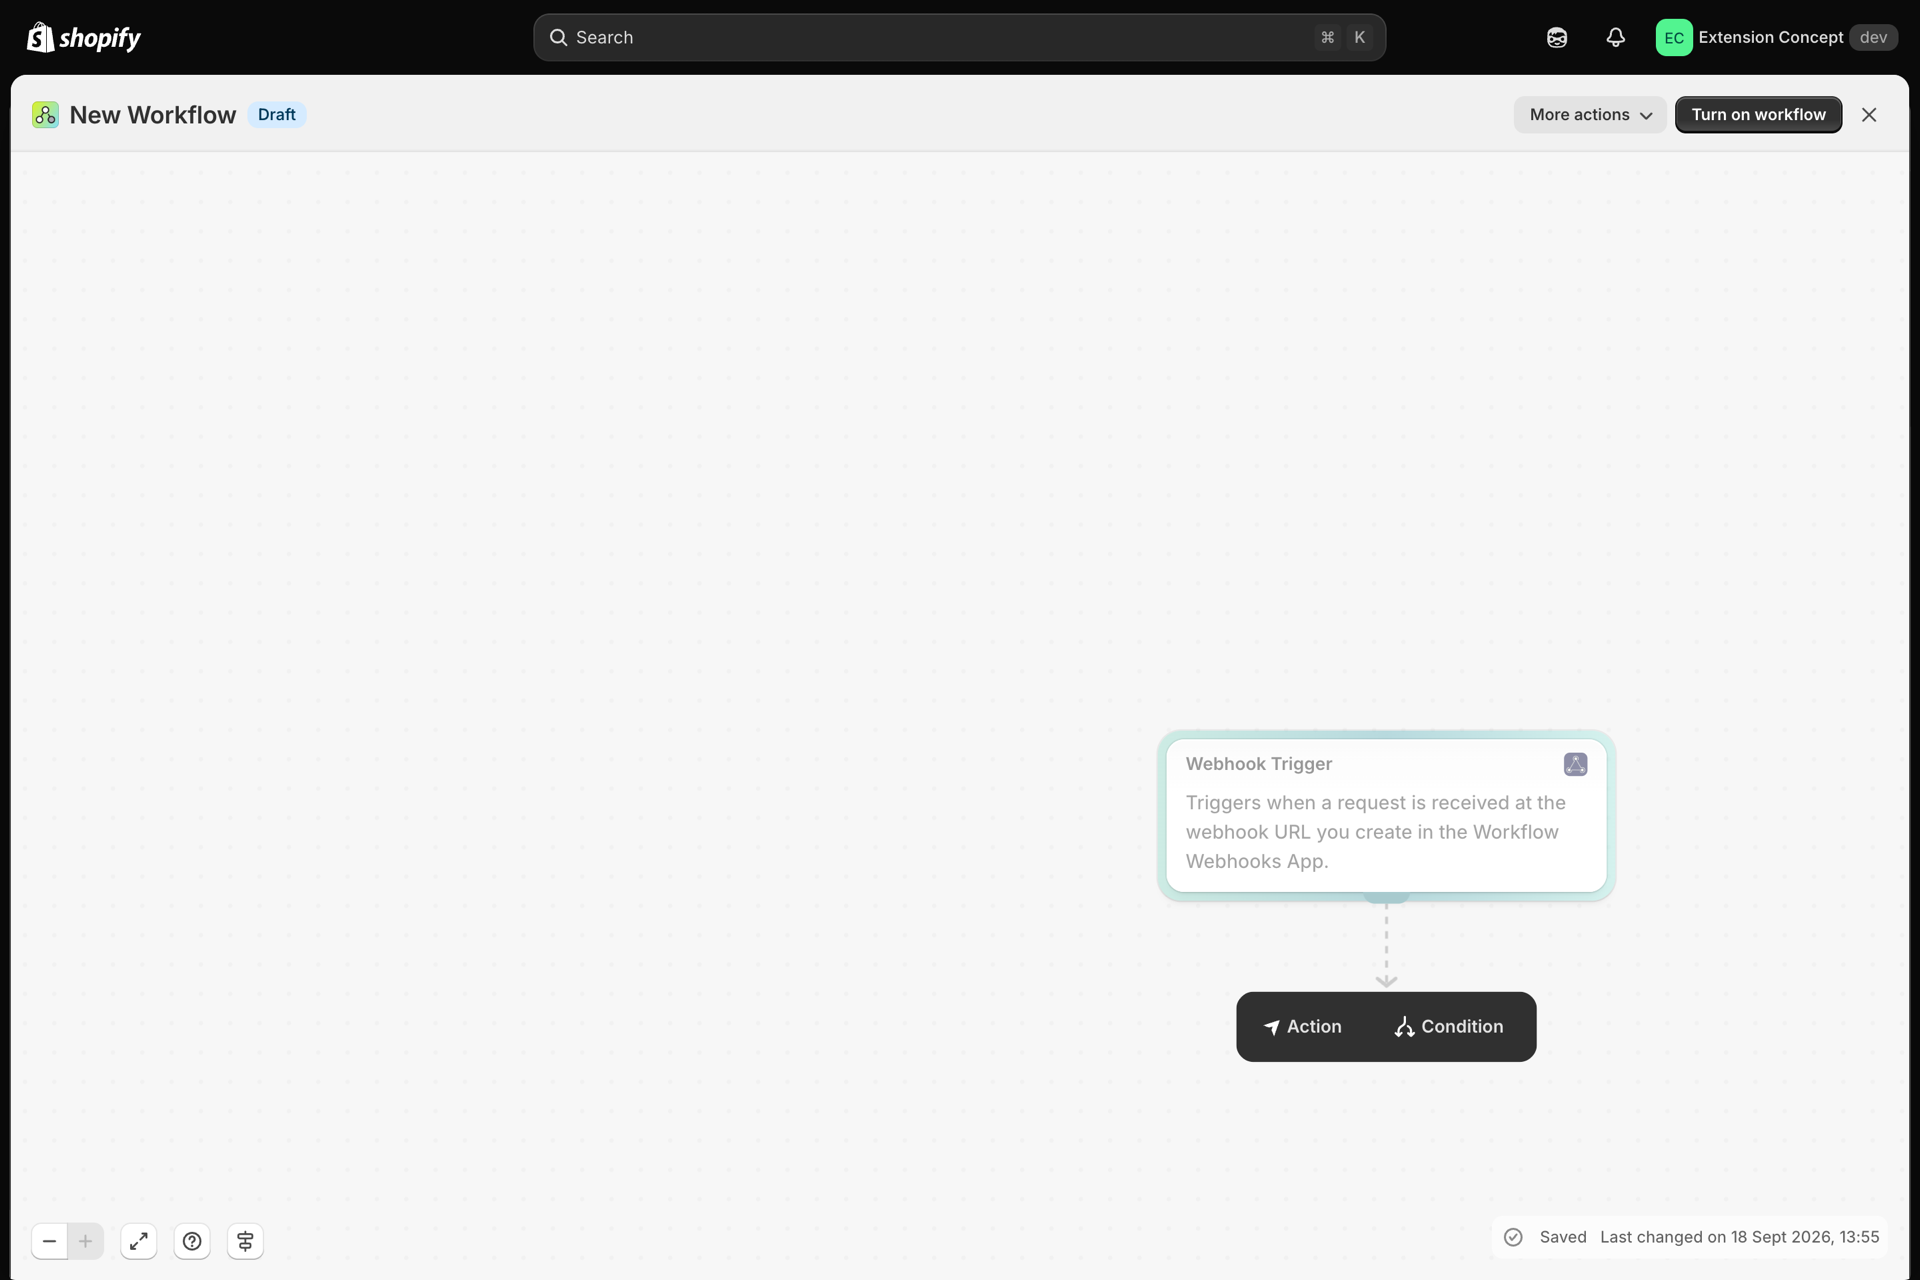
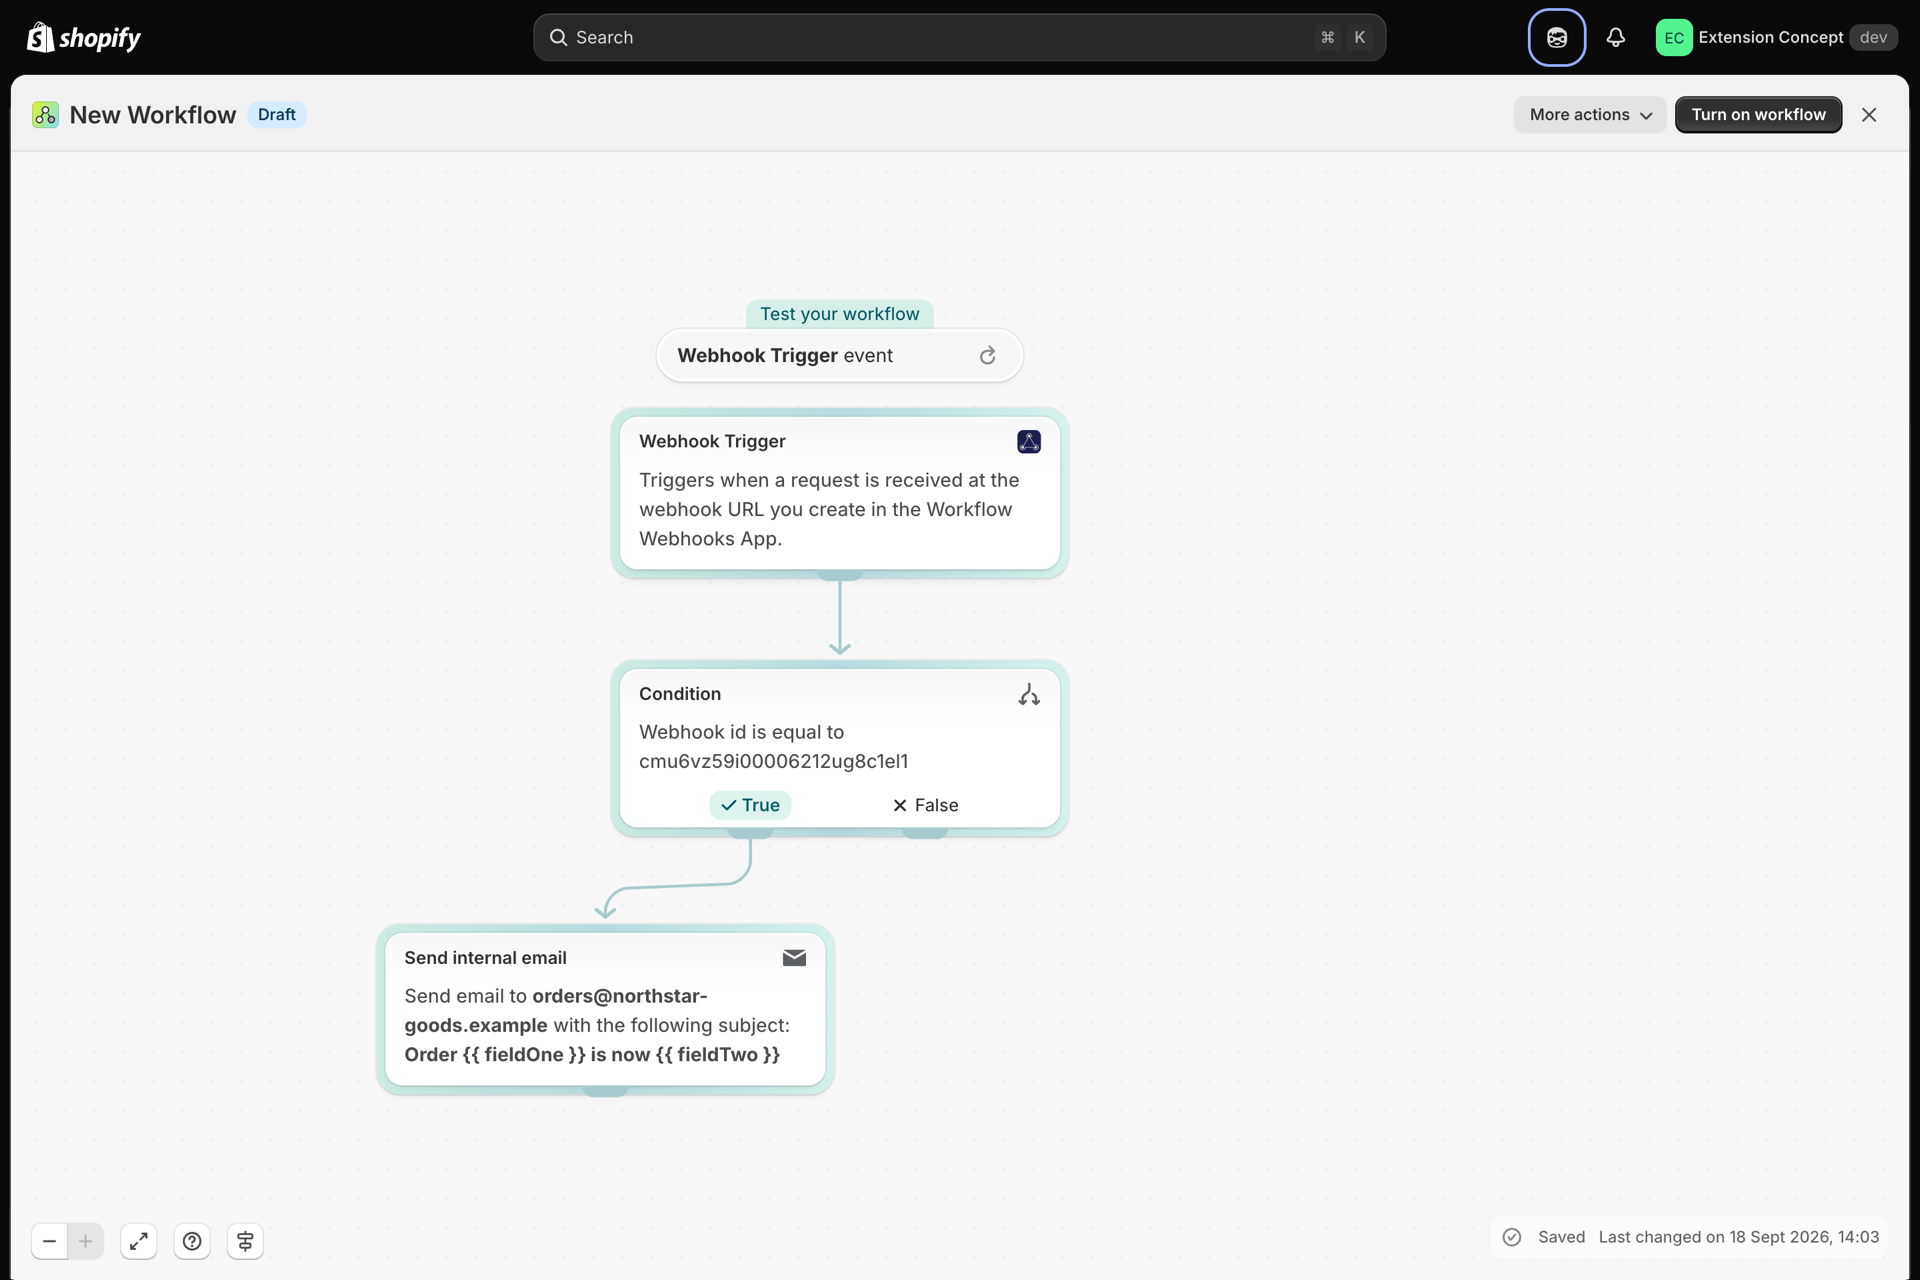
In Shopify Flow, create a workflow starting with the Webhook Trigger trigger.
- Add the trigger and click Record Events.
- Come back here, open the invocation in History, and press Replay. Flow now has a real example payload to work with - much easier than guessing field names.
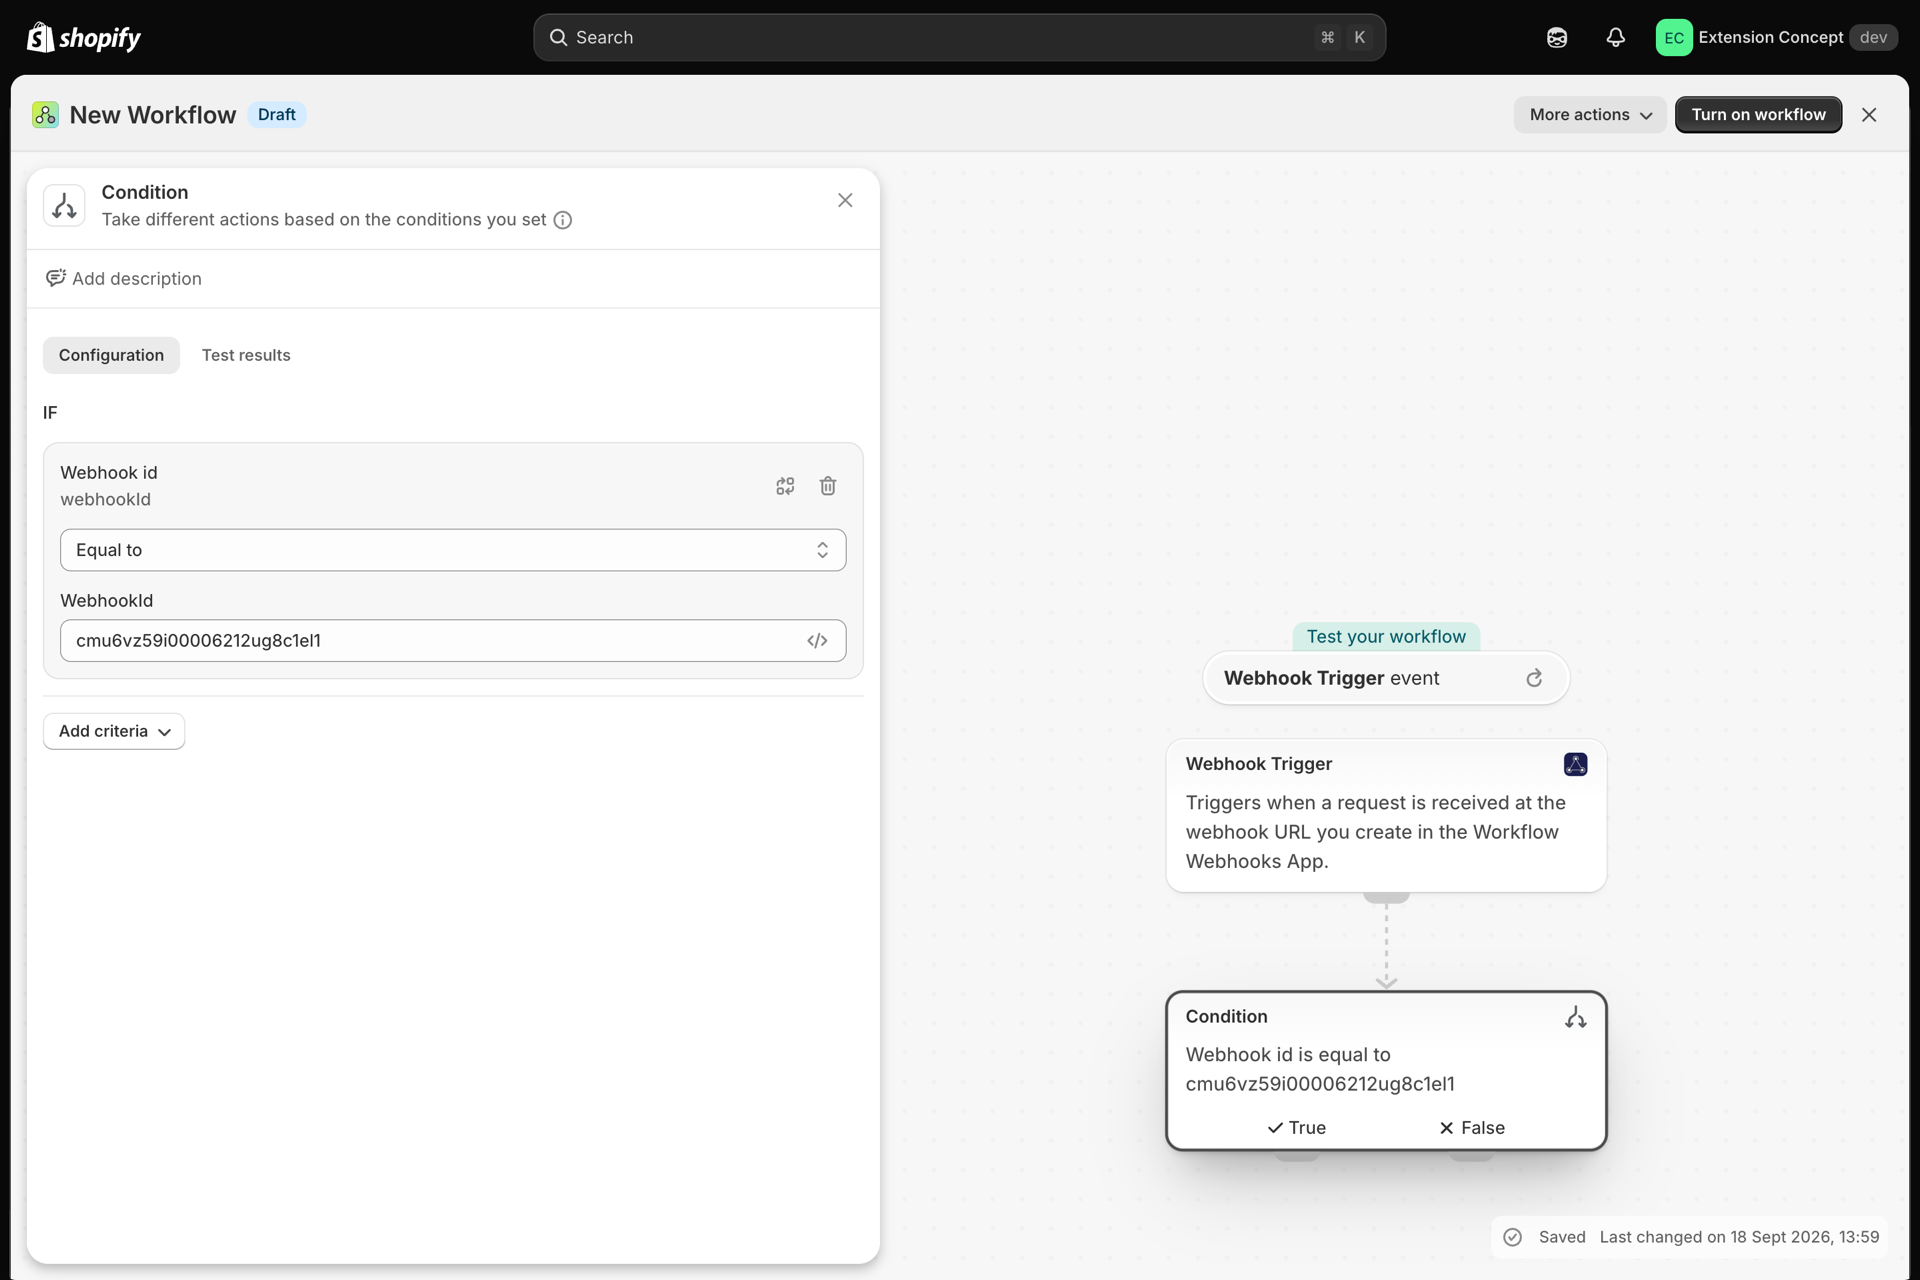
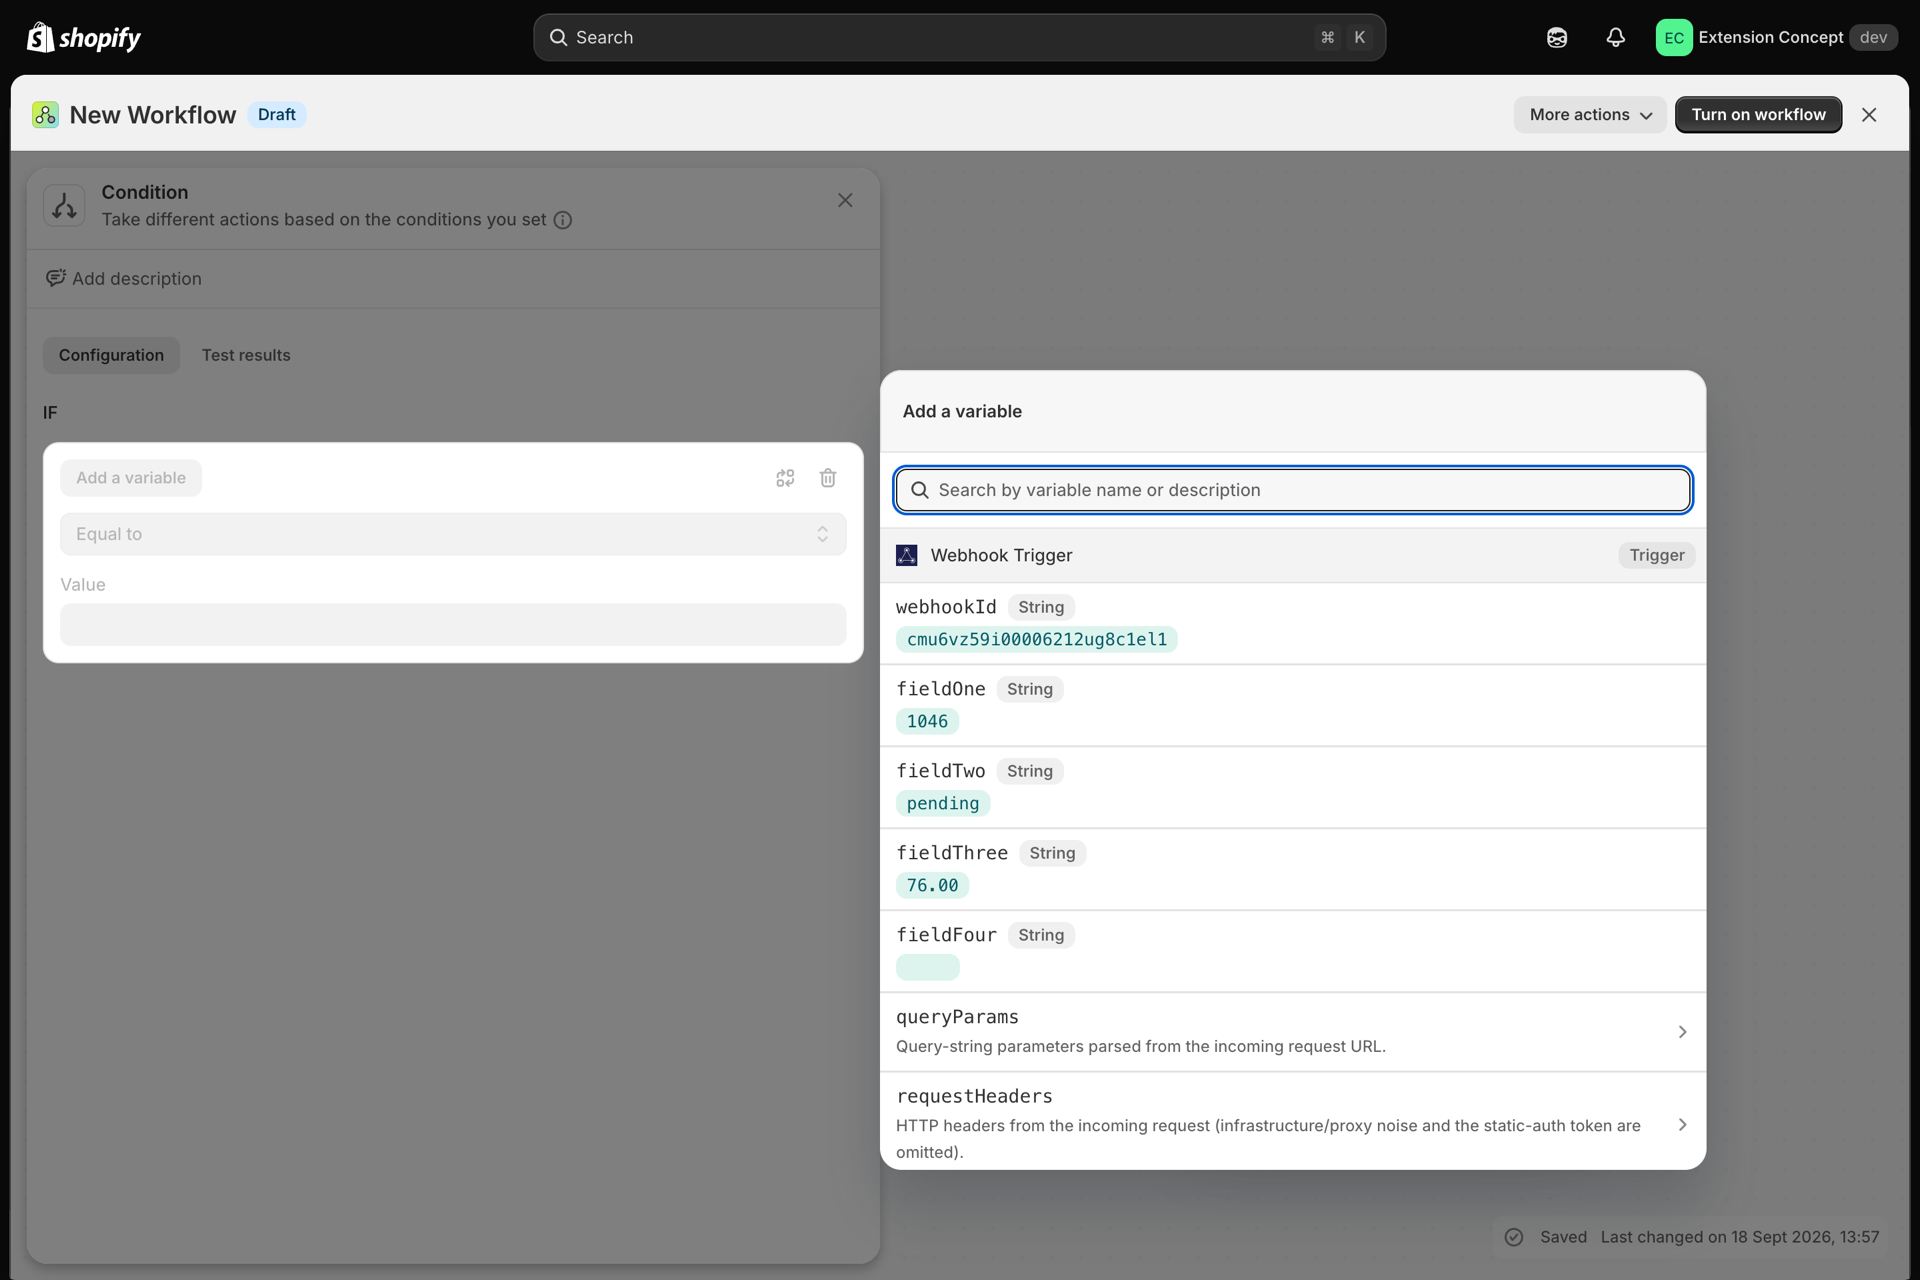
- Add a Condition:
Webhook IDequals your webhook's id (shown on the webhook page). Every Webhook Trigger workflow receives events from all your webhooks, so this condition is what makes the workflow respond to only this one. - Add your actions, using
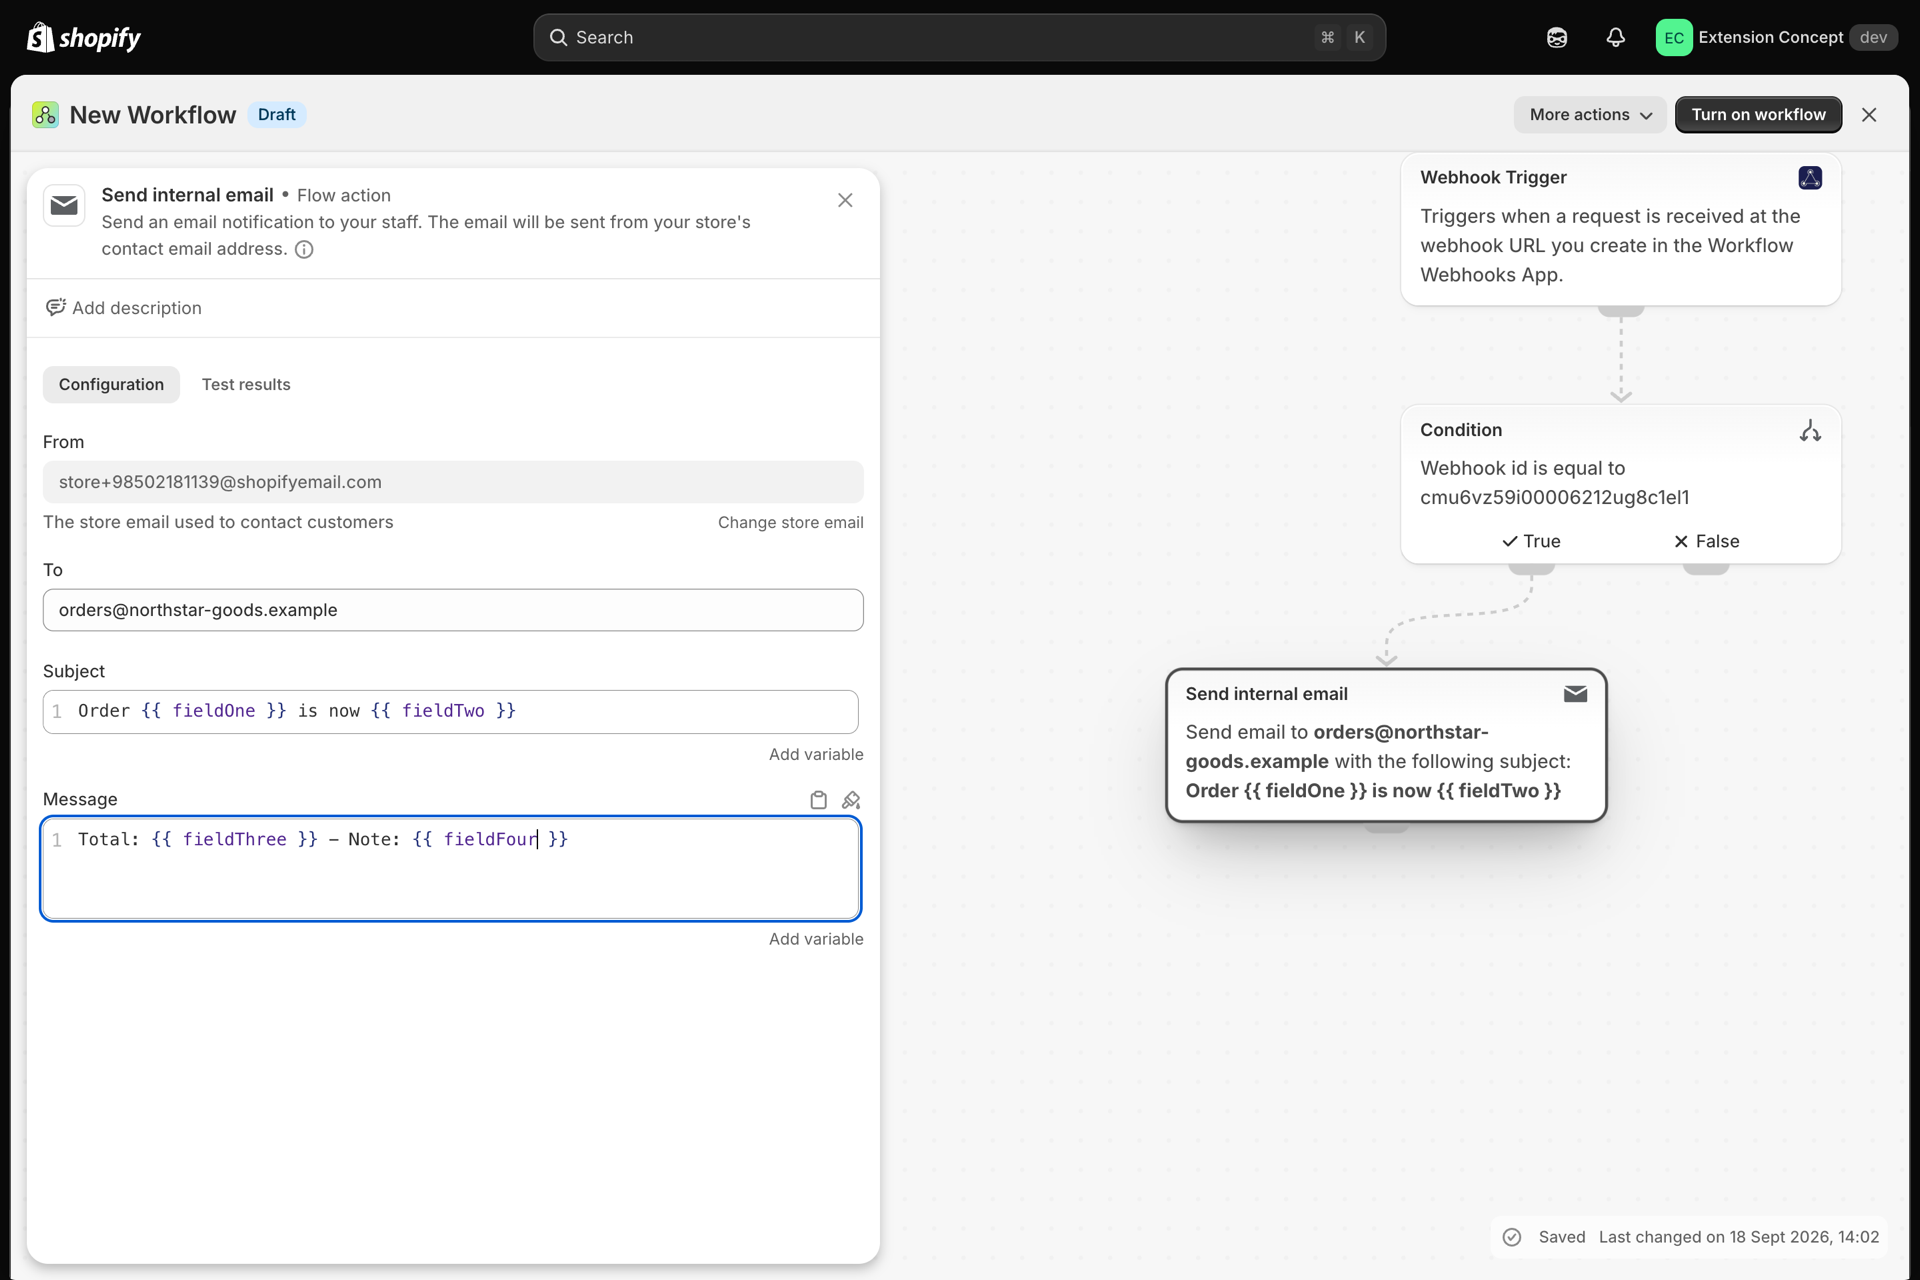
{{fieldOne}}to{{fieldFour}}. - Turn the workflow on.
6. Go live
Point your real system at the webhook URL. Watch the first few calls in History to confirm they arrive and succeed.
If your sender retries on timeout, turn on Duplicate delivery protection so a retry cannot run your workflow twice.