

Add order note when webhook received
When a 3PL, ERP or support tool calls your webhook with an order number and a message, add the message to the order note. The existing note is kept and the message goes on a new line.
One trigger from Workflow Webhooks and Shopify's built-in actions, no other app needed.
What it needs
A webhook in Workflow Webhooks with this payload mapping. See Payload mapping and Flow variables.
| Field | What to map to it |
|---|---|
fieldOne |
The order number, for example #1001 |
fieldTwo |
The message to add, for example Packed by warehouse B |
A call to the webhook then looks like this:
bash
curl -X POST https://<your webhook URL> \
  -H "Content-Type: application/json" \
-d '{"orderNumber": "#1001", "message": "Packed by warehouse B"}'Get the workflow
- Download the
.flowfile attached at the bottom of this page. - In your Shopify admin open Flow, click Import and choose the file.
- Check the steps, then click Turn on workflow.
The file is an export from Shopify Flow itself. Do not edit it by hand; change the workflow in Flow after importing it.
How it works
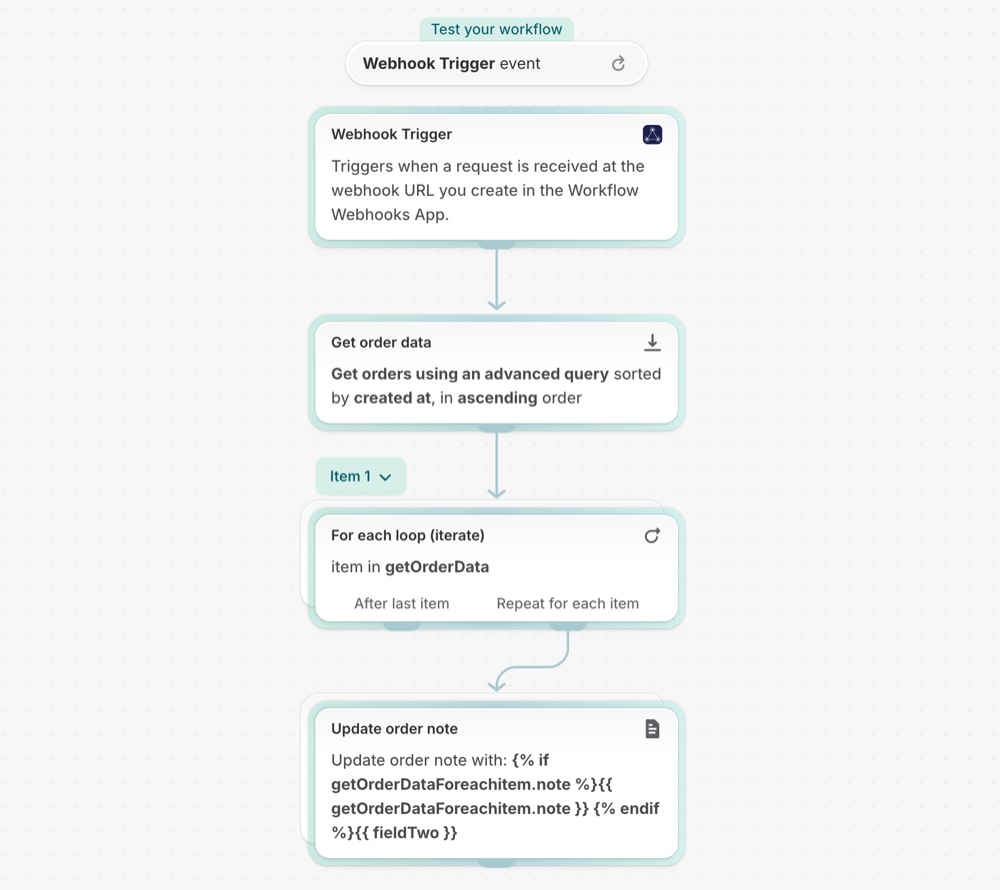
- Webhook Trigger starts the workflow each time your webhook URL is called and hands it the mapped fields.
- Get order data looks up the order with the query
name:{{fieldOne}}and keeps at most one result. - For each runs once for the order it found, and not at all when no order matches.
- Update order note writes the current note, a line break and then
{{fieldTwo}}, so nothing already in the note is lost.
Make it yours
- Put a date in front of the message with
{{ "now" | date: "%Y-%m-%d" }}. - Add Add order tags after the note step so the orders are easy to filter.
Next steps
- Create your first webhook - create the webhook this workflow listens to.
- Workflow templates - all templates.
- History and troubleshooting - check that the webhook reached Flow.